Whether you’re looking for an indulgent Saturday night treat, or the perfect Sunday roast, pork belly is up there as one of the tastiest meats to cook. The combination of the succulent juicy flesh, and the crisp rind (that offers a satisfying crunch when bitten into), is quite frankly, delicious.
However, getting that gorgeous crisp crackling is no mean feat. It requires high temperatures, as well as all of the moisture to be removed from the rind before cooking.
The problem is I find cooking pork belly in the oven is just so unpredictable - some days I’ll get the perfect crunchy skin, but others I’ll be left with a soggy, claggy rind that’s just not appetizing. It’s a long process too, taking hours when using traditional cooking methods.
This led me to wonder if using an air fryer might have a better result, turning out succulent juicy meat with crisp, crunchy skin, far quicker than an oven. Air fryers have a much smaller cooking cavity than a traditional oven, which means the hot air can circulate around food more rapidly - this is what creates a crisp finish on a variety of foods, so could it work here?
I’ve been so impressed with this handy appliance that I’ll never go back to cooking fries in the oven again. I even found cooking French Toast in an air fryer was far easier than on the stove, so could this kitchen gadget do the same for pork belly?
Best air fryer deals
Read on to discover what happened when we cooked pork belly in an air fryer - or, if you’ve already decided you want to invest in this handy kitchen appliance, check out the best prices right now:
It’s all in the preparation
Before even switching on an air fryer, there’s some preparation that needs to be done to ensure the pork belly has a crunchy, crisp skin. First, start by scoring the rind in a criss-cross pattern. This ensures the heat from the air fryer can cause the fat to render (where it melts are purifies so it can be consumed), which partly creates the crisp finish.
You also need to sprinkle the skin with salt and leave it uncovered in a fridge for a couple of hours, to draw out as much moisture as possible - the other aspect to creating the crunchy skin. Before cooking, blot the skin dry with a paper towel to remove the moisture the salt has drawn out.
Brush it with oil, again, which offers additional help in rendering the fat, and sprinkle with salt flakes for flavour and again to remove any moisture left in the joint.
I’ve regularly cooked pork belly in my oven, so I know that the joint needs a high temperature at the start of cooking, which should then be reduced to a lower temperature to ensure the meat doesn’t dry out.
However, as an air fryer can cook food quicker than a standard oven - something my previous experience cooking with the appliance has shown when I made fried chicken to rival KFC in an air fryer -I didn’t think lowering the temperature part way through cooking would be necessary.
I also did some research on air fryer pork belly recipes, and settled on a cooking temperature of 401 F / 205 C degrees. The piece of pork belly weighed 0.77lb / 350g, and using a meat calculator, I worked out that it would take 40 minutes if cooked by traditional methods.
However, as air fryers speed up cooking durations, I opted for 20 minutes initially, as I could always cook for longer if it wasn’t at the required temperature for pork, rather than risk overcooking the meat. The USDA states this is 145 F, but in the UK, the FSA recommends pork should reach 70 C for two minutes when checked with a food thermometer. The only thing left to do now was start cooking.

Crisp and crunchy on the edges
I dialled in the temperature and cooking duration on the Instant Vortex Plus air fryer (currently our top-rated air fryer), which saw the appliance preheat for three minutes before alerting me it had reached the required temperature. I then placed the pork belly on the crisper plate in the air fryer basket and cooking commenced.
Part way through cooking the air fryer alerted me that it’s time to turn the contents of the basket, so the hot air can reach every inch of the food to ensure a crisp finish. However, in this instance I chose to ignore the alert, as turning the pork would have resulted in moisture getting on the skin and making it soggy rather than crisp.
When cooking ended, I was disappointed. It was quicker, but nor crisper than using an oven.
The crisper plate and frying basket were also swimming with fat - really I should have learnt my lesson from when I made cinnamon rolls in an air fryer - it was clear the pork belly needs to be placed on a suitable sized metal tray, on foil or on baking paper to ensure I don’t have a sticky mess to clean up, too.
Feeling slightly deflated, I turned to the internet to research what else I could do to ensure the skin was crisp and crunchy.
Several sites, including these articles from the Guardian and Seven Point Pork, recommend pouring boiling water on the rind after it has been scored to shrink the skin. This ensures that the oil, salt and heat can penetrate the rind better, removing even more moisture leaving the skin crisp.
So I decided to give this a go on another piece of pork belly. As soon as I scored the rind, I placed the pork belly on a metal rack, so the water could drain away rather than cooking the flesh of the pork belly, and slowly tipped two litres of boiling water over the rind.
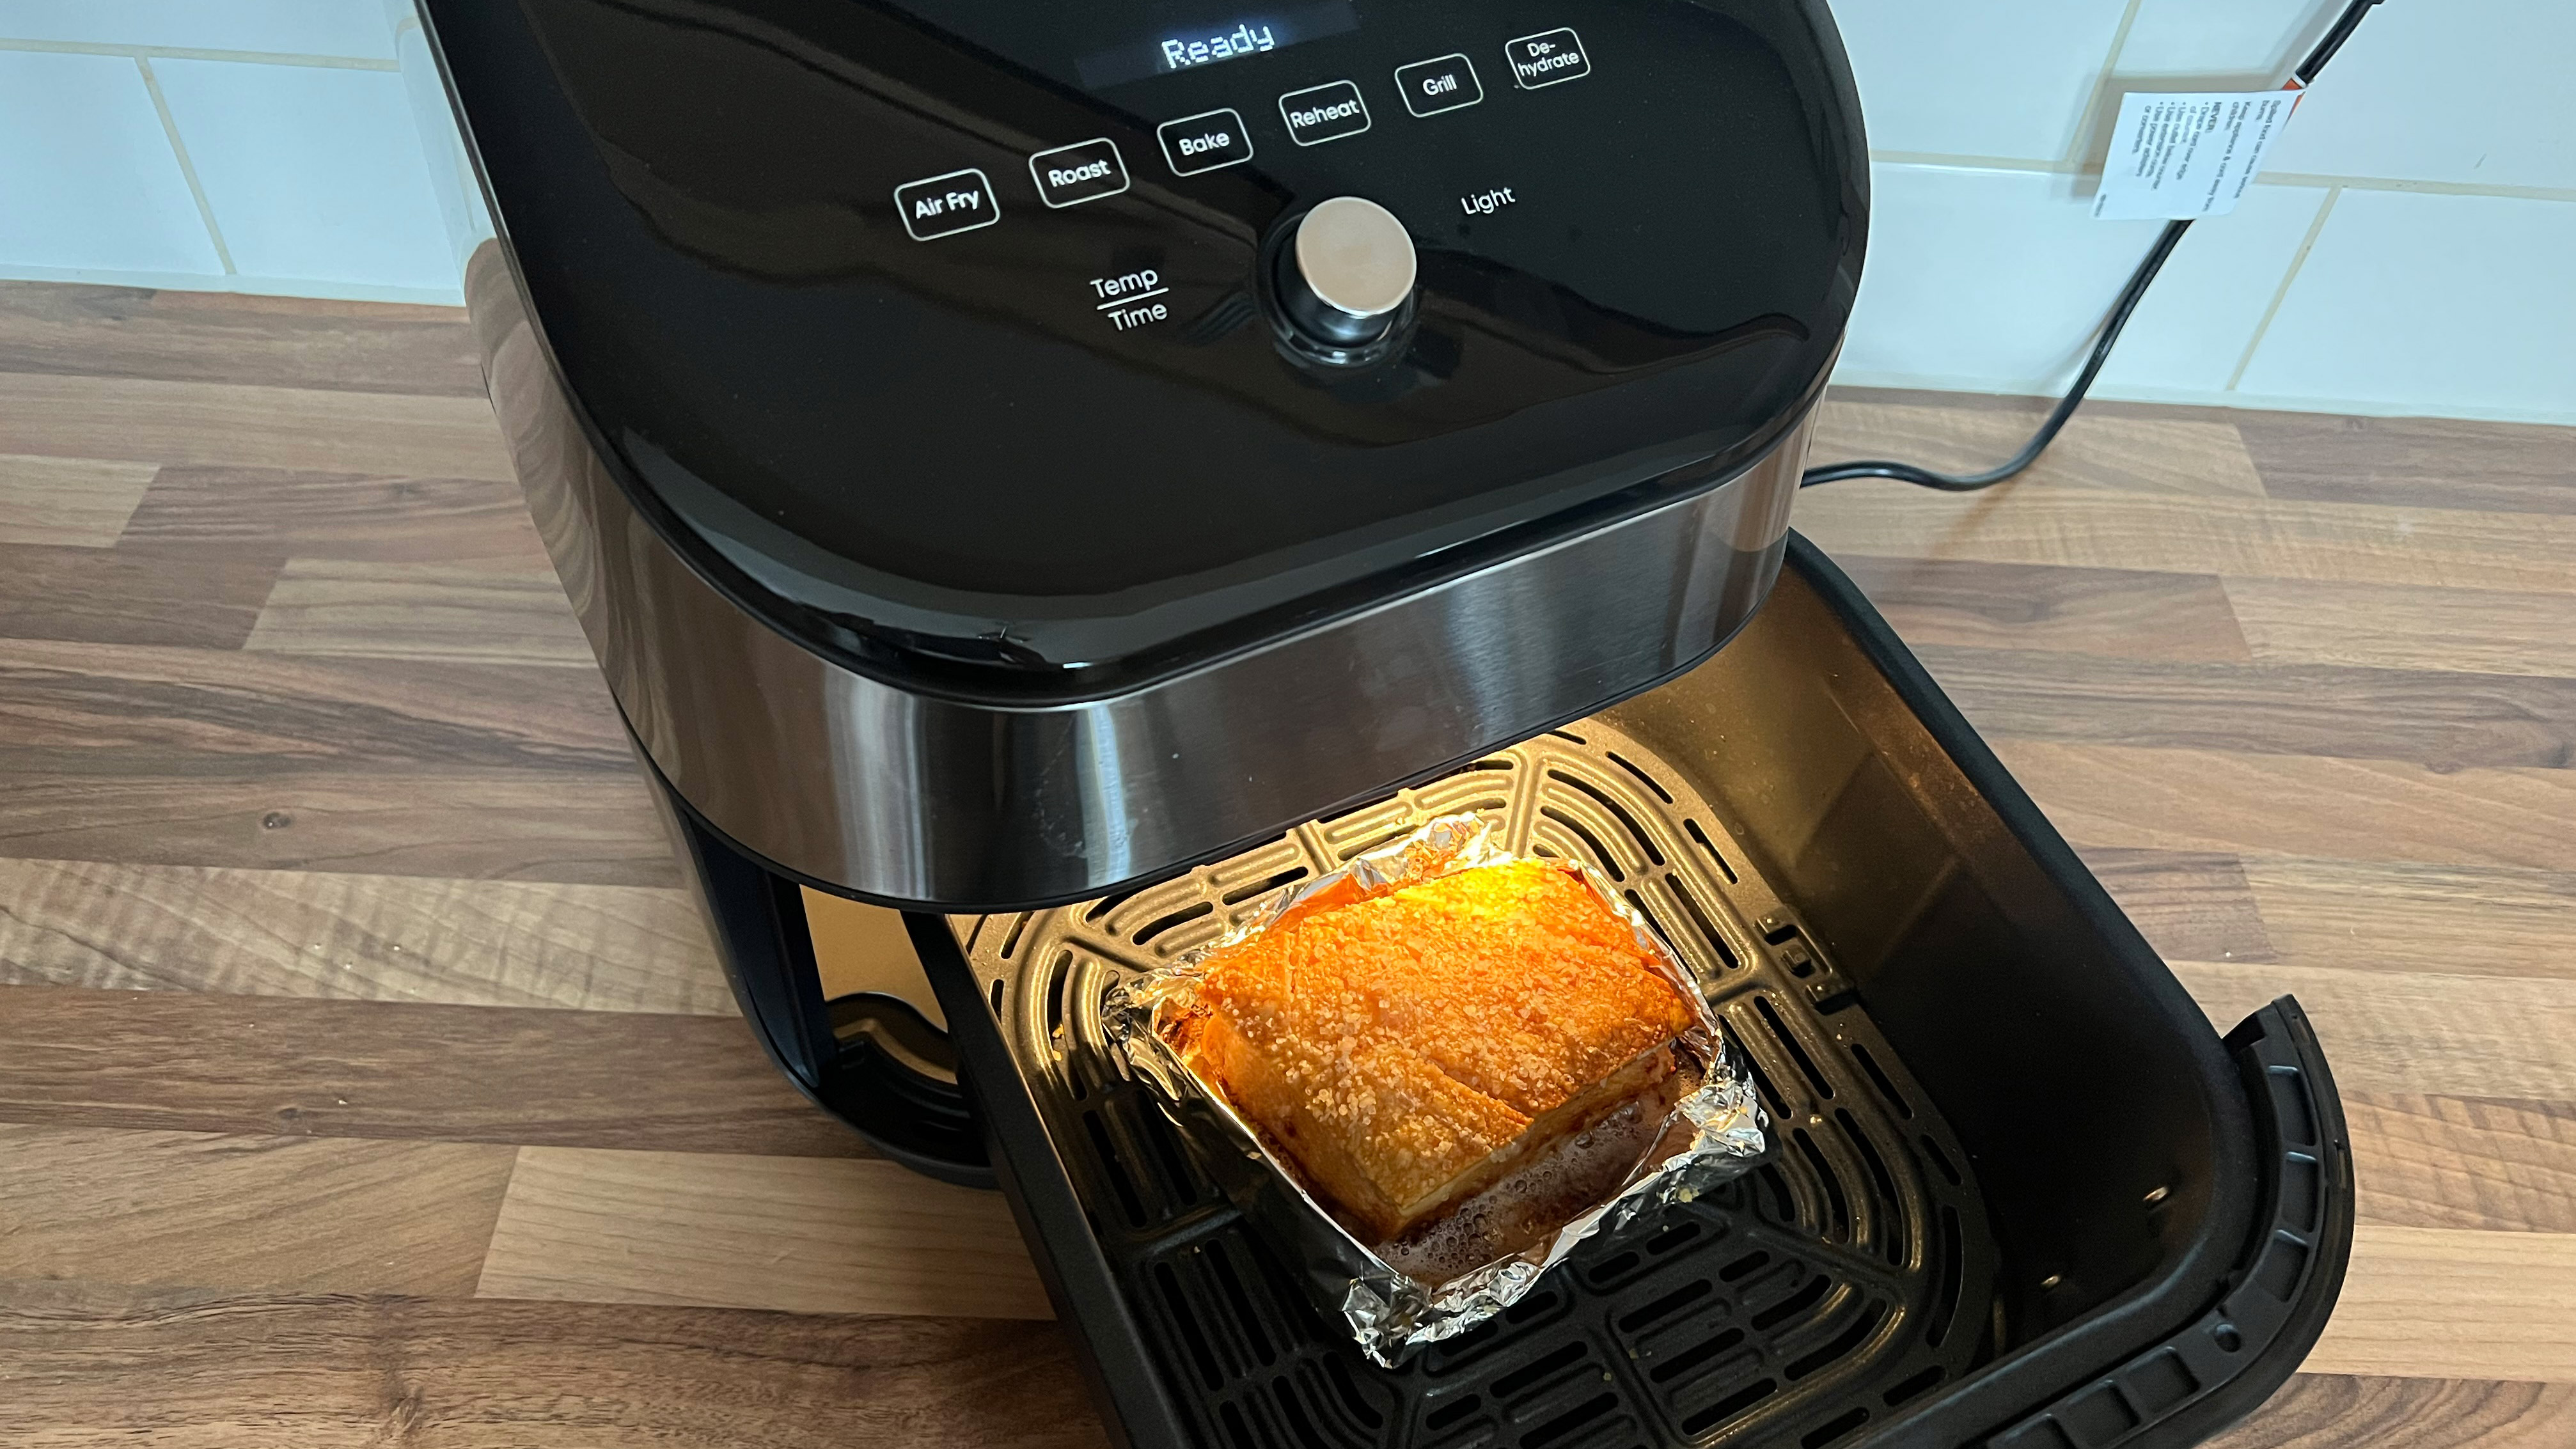
I then patted it dry and rubbed with salt, leaving it uncovered in the fridge for two hours, before brushing with oil and sprinkling with salt flakes right before air frying. Although this time, I wrapped the base and side of the pork belly in aluminium foil to create a disposable container to collect the excess fat and ensure the crisper plate didn’t end up a sticky mess.
Verdict
As the pork belly weighed the same as before, I used the same temperature and cooking duration, and again chose not to turn the joint part way through cooking. After cooking this time, the pork belly had a much crisper skin than the previous version, although the middle was still a little soggy.
The internal temperature was 68 C, so slightly below UK regulations, which meant it needed a few additional minutes cooking. I added five minutes to the duration, although this time while the internal temperature was safe for consumption, the middle was still not quite crisp enough for my taste so I cooked it for a further five minutes.
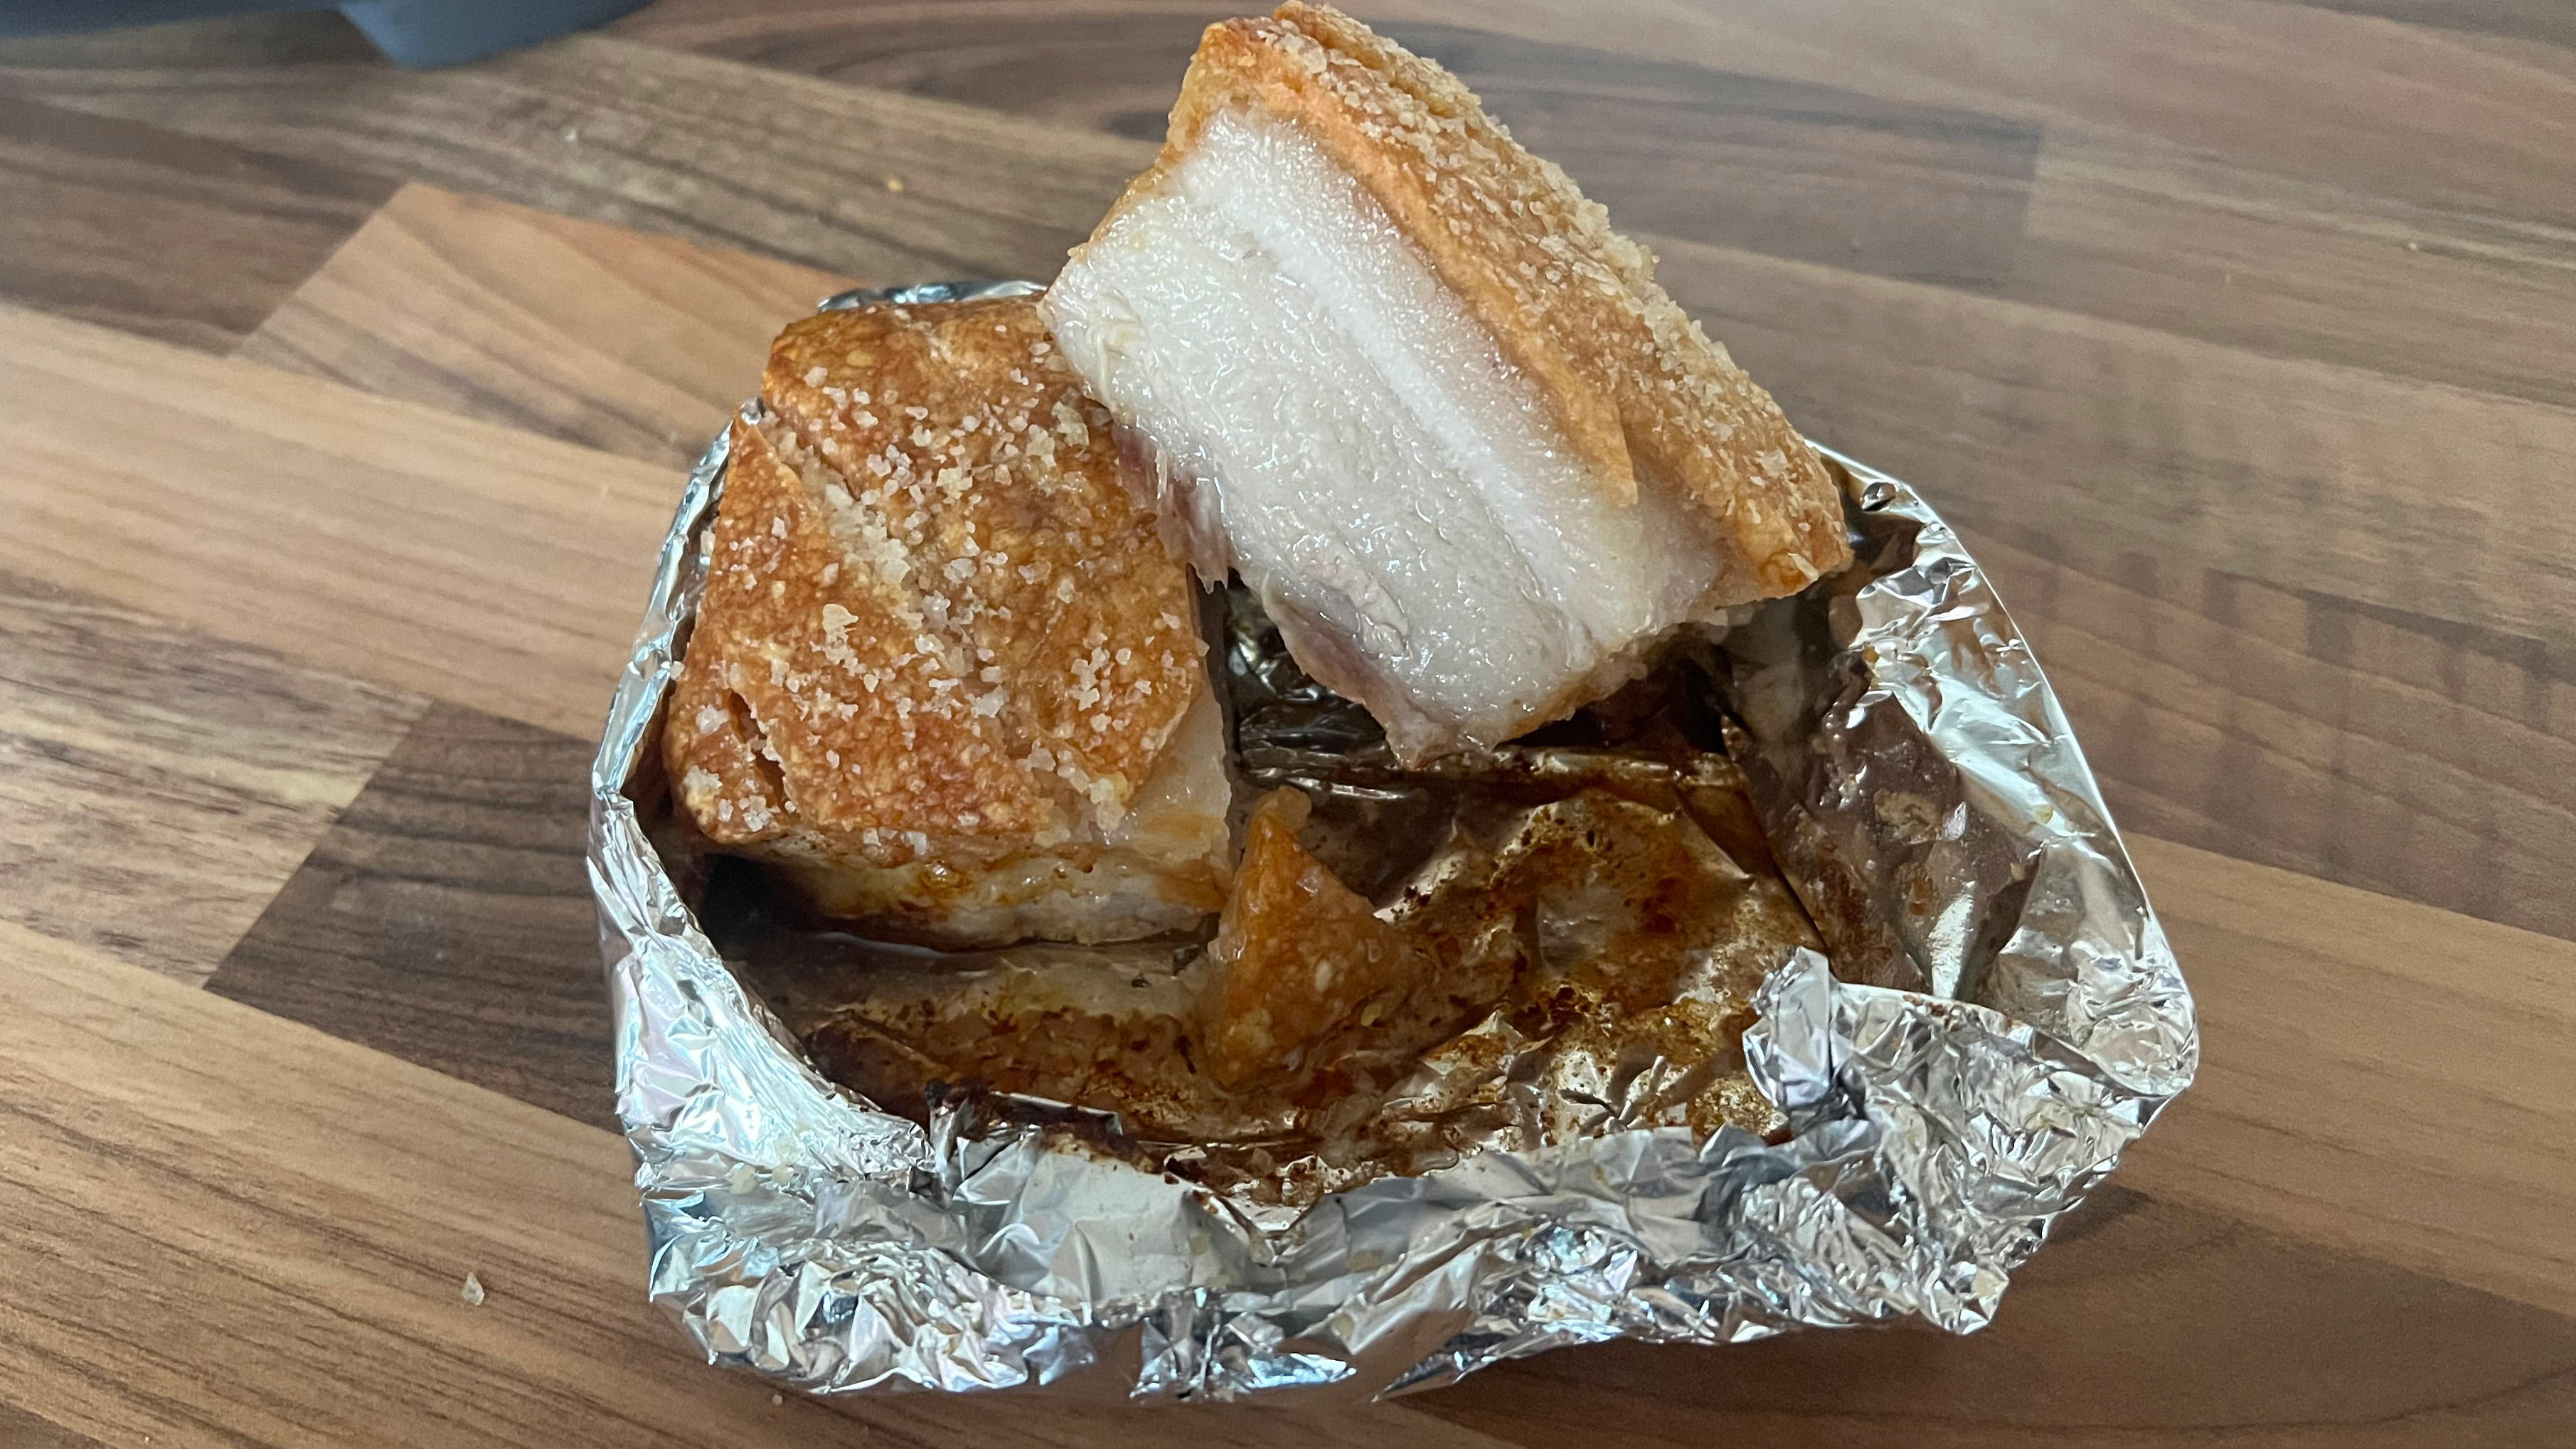
The result was tender flesh with crisp skin that was satisfyingly crunchy when I bit into it. Even my partner was impressed and agreed the air fryer was far more effective than an oven at crisping the skin. Even better, the foil ensured I didn’t have to scrub the air fryer basket clean either.
I’d cracked it.
I’ll certainly be using an air fryer from now on when I want pork belly with deliciously crunchy skin, as it's far more consistent than when using an oven - it’s also quicker too, meaning I won’t be slaving over a hot stove for hours either.

- Check out these great air fryer deals
from TechRadar - All the latest technology news https://ift.tt/WEoOhJG

0 coment�rios: